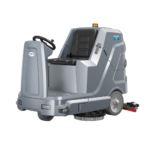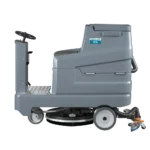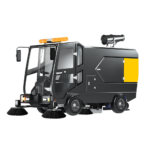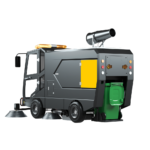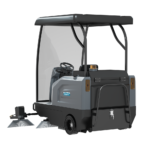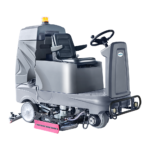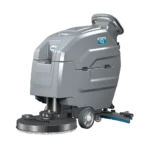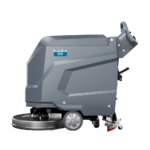
Floor Scrubber Troubleshooting: Most floor scrubber problems trace back to one of three systems: the squeegee (causing streaking), the vacuum path (causing poor water pickup), or the brush drive (causing brush motor failure) and the large majority of cases are a quick wear-part fix, not a failed machine. This guide walks through each problem in order, with the checks that resolve most cases before you ever need to call a technician.
Table of Contents
Why Is My Floor Scrubber Leaving Streaks?
Streaking is almost always a squeegee story. Work through these causes in order:
- Worn or rounded squeegee blade edge. The wiping edge dulls with use, which is the single most common cause of streaking. Wipe the blade, inspect the edge, and flip it to a fresh edge or replace it if it’s rounded or torn — most blades offer multiple usable edges before full replacement is needed.
- Debris caught under the blade. Even small debris breaks the seal against the floor. Clean the blade and the area directly under it before reassembling.
- Squeegee misalignment. The blade may not be damaged but may have shifted from use. The ideal setup has roughly one-third of the blade making contact with the floor at the correct trailing angle — adjust it to be level and test water recovery again.
- Uneven flooring. A raised tile, warped section, or grout line causes gaps in blade contact that no amount of squeegee adjustment fully solves. Reduce cleaning speed in these areas or adjust squeegee pressure if your machine allows it.
- Wrong pad or brush for the floor, or incorrect chemical dilution. Too much solution flooding the floor, or a pad/brush mismatched to the floor type, leaves the vacuum system more water than it can recover in one pass. See Floor Scrubber Brush vs Pad: Which Is Better? for matching consumables to floor type.
- Moving too fast. Operator speed matters moving quickly doesn’t give the brush enough time to scrub or the squeegee enough time to fully pick up water, even on a perfectly functioning machine.
If water is still not being recovered after checking and correcting all of the above, the issue has likely moved from the squeegee to the vacuum system or recovery tank covered next.
Also read – Import and Shipping Considerations for Industrial Cleaning Equipment
Automatic Scrubber Not Picking Up Water?
Water pickup depends on three systems working together: a functional vacuum motor, an unobstructed suction path, and a properly sealed squeegee assembly. If you’ve already ruled out the squeegee causes above, work through the suction path:
- Recovery tank full. The vacuum motor can’t do its job once the tank reaches capacity always start here, since it’s the simplest possible cause.
- Clogged or dirty vacuum filter. Remove the filter and rinse it under running water until clean; a clogged filter is one of the most common causes of weak suction.
- Cracked or loose vacuum hose. Even a small crack or loose connection creates an air leak that disrupts suction. Inspect the full length of the hose, not just the ends.
- Damaged or dirty recovery tank lid gasket. A loose, cracked, or dirty gasket lets air leak into the tank, and even a small leak dramatically reduces suction power. Check the lid seal, hose connections, and squeegee assembly fit.
- Dirty float shutoff. The float protects the vacuum motor from water intake, but if it’s clogged with foam, debris, or buildup, it restricts airflow and reduces suction.
- Foam in the recovery tank. Overly sudsy cleaning solution creates foam that affects vacuum performance — using a properly diluted, low-foam solution formulated for scrubbers prevents this.
- Full debris tray (on ride-on models). A tray positioned at the entry to the vacuum system can act like a plug once full, cutting suction entirely. On shifts with heavy debris, check it mid-shift rather than waiting until the end.
- Low battery voltage. Weak battery power causes a weak or non-functional vacuum motor. If this happens frequently, it may be time to service or test the battery.
- Vacuum motor or wiring fault. If suction is still weak after all of the above, the vacuum motor itself may need professional service — this is the point to call a technician rather than continue troubleshooting further.

Floor Scrubber Troubleshooting Vacuum: Step-by-Step Checklist
Work through this sequence in order the first few steps resolve the majority of cases:
- Empty the recovery tank if it’s full.
- Remove, rinse, and reinstall the vacuum filter.
- Inspect the full length of the vacuum hose for cracks or loose fittings.
- Check the recovery tank lid seal and gasket for damage or dirt.
- Check the float shutoff for clogging.
- Confirm you’re using a properly diluted, low-foam solution excess foam is a common overlooked cause.
- On ride-on models, empty and rinse the debris tray.
- If suction is still weak, test or service the battery.
- If none of the above resolves it, the vacuum motor or wiring likely needs professional diagnosis.
What Causes Brush Motor Failure, and How Do You Fix It?
Brush motor issues range from simple debris jams to genuine motor failure. Work through causes roughly in order of likelihood:
- Debris or hair wrapped around the brush or shaft. This is one of the most common causes of a brush that won’t spin, and it can stall the motor if left unaddressed. Clear tangled material at every debris/tank check rather than waiting for it to cause a stall.
- Worn, slipping, or broken drive belt. Most scrubbers transfer motor power to the brush through a belt or coupling. Frayed belts, slipping, or misalignment prevent the motor from turning the brush even though the motor itself runs fine. Replacing or re-tensioning the belt is often all that’s needed.
- Blown fuse, tripped breaker, or loose wiring. Check the control panel and wiring connections before assuming the motor itself has failed.
- Motor overheating or burnout. Most motor failures trace back to one of three causes: overloading (running the machine on an application it wasn’t designed for), overheating (often from clogged vents restricting airflow), or deferred maintenance (ignoring early warning signs until the motor burns out). Signs include strange noises, a burning smell, reduced torque, or no response during operation.
- Worn carbon brushes inside the motor. Many scrubber motors use carbon brushes to conduct current to the rotating commutator. Discoloration, visible carbon dust, crumbling material, sparking, or a noticeable drop in motor performance all indicate the carbon brushes are worn and need replacement a routine, relatively inexpensive fix compared to full motor replacement.
- Battery protection cutoff (on battery-powered ride-on models). If the brush deck suddenly stops engaging near the end of a charge cycle while the machine still drives normally, this is often intentional battery protection cutting power to the brush motor before drive power — not a mechanical fault at all.
- Control panel or relay failure. Switches, relays, or circuit boards controlling the brush motor can fail independently of the motor itself, cutting power without any motor damage.
When to call a technician: blown fuses, confirmed motor faults, control board issues, or any electrical fault that can’t be traced back to the battery, terminals, or a simple belt/debris issue. Opening the motor housing or splicing electrical connections on a warranty-covered machine can void the warranty — see Commercial Floor Scrubber Warranty for what typically stays covered only when repairs go through an authorized channel.
Floor Sweeper Brush Replacement Guide
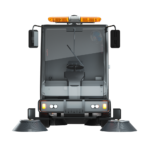
Floor sweeper main brushes and side brushes wear differently from scrubber brushes since they’re constantly making ground contact to move debris, not scrubbing with downward pressure. A general approach:
Signs a sweeper brush needs replacement:
- Bristle length worn down to roughly 50–70% of its original height, depending on the manufacturer’s specific threshold
- Uneven wear across the brush width, causing inconsistent debris pickup
- Bent, frayed, or missing bristles
- Debris or hair wrapped around the brush shaft, restricting rotation
Typical replacement interval: this varies significantly by material and surface — as a rough guide, polypropylene brushes on rough surfaces like asphalt tend to need replacement sooner (in the range of 200–250 operating hours) than the same brush on smooth sealed concrete (300–350 hours). Usage intensity and debris type will shift these figures in either direction, so treat them as a starting estimate rather than a fixed rule.
Step-by-step replacement:
- Power off the machine and disconnect it from the charging station.
- Release the old brush using your model’s specific mechanism (typically a snap-in or screw-in latch — check your manual for the exact method).
- Clean the brush housing of any accumulated debris before installing the new brush.
- Inspect the new brush for defects before installation.
- Install the new brush securely and test that it rotates freely before returning the machine to service.
- If you’re using dual side brushes, consider swapping left and right periodically if you notice uneven wear between them.
Check for debris wrapping around the brush shaft at every hopper dump rather than waiting for a full inspection cycle — plastic film, packing straps, and similar material are common culprits that can stall a brush motor if left unaddressed.
DIY Fix or Call a Technician?
| Issue | DIY-Safe | Call a Technician |
| Squeegee cleaning, flipping, or replacement | ✓ | |
| Filter cleaning | ✓ | |
| Hose and gasket inspection | ✓ | |
| Tank cleaning | ✓ | |
| Brush/pad cleaning and replacement | ✓ | |
| Debris/hair removal from brush shaft | ✓ | |
| Belt tensioning or replacement (if accessible) | ✓ | |
| Motor internals, rewinding | ✓ | |
| Control board or relay faults | ✓ | |
| Confirmed wiring faults | ✓ | |
| Any repair on a warranty-covered machine | ✓ (to preserve coverage) | |
| Burning smell, erratic movement, motor cutting out under load | ✓ (stop using immediately) |
Preventing These Issues From Recurring
Nearly every issue covered in this guide is preventable with consistent daily and weekly care — rinsing tanks, cleaning the squeegee, checking for tangled debris, and inspecting brush wear before it becomes a failure. See the full Floor Scrubber Maintenance Schedule for the complete daily, weekly, and monthly checklist that prevents most of the problems in this guide from happening in the first place.
Next Steps
For the daily and weekly habits that prevent most of these issues before they start, see the Floor Scrubber Maintenance Schedule. If a repair goes beyond routine wear-part replacement, contact the Aokelang team for parts and service support, or browse the full floor scrubber and floor sweeper ranges if persistent issues suggest it may be time to consider a replacement machine.
Floor Scrubber Troubleshooting FAQs
Why is my floor scrubber leaving streaks even after replacing the squeegee?
If streaking continues after a squeegee replacement, check squeegee alignment and pressure, confirm you’re using the correct pad or brush for your floor type, verify chemical dilution isn’t too strong, and reduce cleaning speed — any of these can cause streaking independent of squeegee condition.
Why is my automatic scrubber not picking up water even though the squeegee looks fine?
Move to the vacuum path: check the recovery tank fill level, filter cleanliness, hose integrity, lid gasket seal, and float shutoff in that order. A vacuum motor or wiring fault is the last thing to suspect, not the first.
How do I know if it’s a brush motor problem versus a belt problem?
If the motor runs (you can hear it) but the brush doesn’t spin, suspect a belt or coupling issue first. If the motor itself makes no sound, runs erratically, or shows signs of overheating, the motor or its electrical supply is the more likely cause.
Is it safe to replace scrubber brushes myself?
Yes — brush and pad replacement is one of the most routine DIY maintenance tasks and doesn’t typically involve opening the motor housing or working with internal wiring.
How often should I check for debris wrapped around sweeper brushes?
Check at every hopper dump rather than waiting for a scheduled inspection — debris wrapping around the brush shaft is a common, preventable cause of motor strain and can escalate to a stall if left unaddressed for multiple shifts.